Serving content with Cloudfront using Origin Access Identity
In this post, how to setup a Cloudfront Distribution with an S3 Origin that is locked down to only allow an Origin Access Identity. I grabbed a cheap domain to play with, funnily enough pail.live was available, so this example is based around that domain.
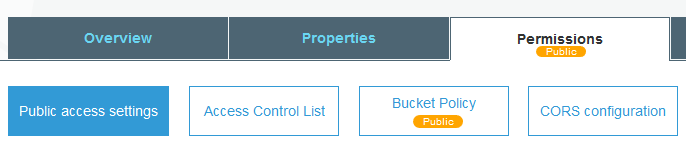
By default, when one hosts static content from a bucket, even if utilising Cloudfront, the content is still directly accessible via the S3 endpoint URL, it has to be publicly accessible to provide global unauthenticated read access so as to allow Cloudfront in.
The AWS S3 Console is getting noisy on this “public” state too, where it is alerting us to the fact the bucket contents are exposed to the world. But, unless you’ve truly got a bucket you want open to the world, you probably should not be seeing this alert:
Getting rid of these Public buckets is the first step before a complete lockdown of an AWS account with S3 “block public access” switch, see S3 Block Public Access.
There is a way to allow Cloudfront access and deny everything else, it’s known as Origin Access Identity. With this, you create an identity that is granted access to your bucket and everything else is denied, mainly because you no longer have the Website Configuration feature available.
There are couple steps one needs to do to enable this, but be aware, doing so will remove some functionality you may have previously enjoyed, such as Redirection Rules, i.e. redirecting example.com/about to the actual page located at example.com/about/index.html, this will no longer work but you may find other ways to add your own redirections. Lambda@Edge is certainly an option for this.
Having Cloudfront as the only way to access your content changes your website to be much more like a hosted website and less like a bunch of files in a diretory.
The next step is creating the Origin Access Identity, which can be done in the AWS Console, via the AWS CLI, or as part of your Cloudformation template.
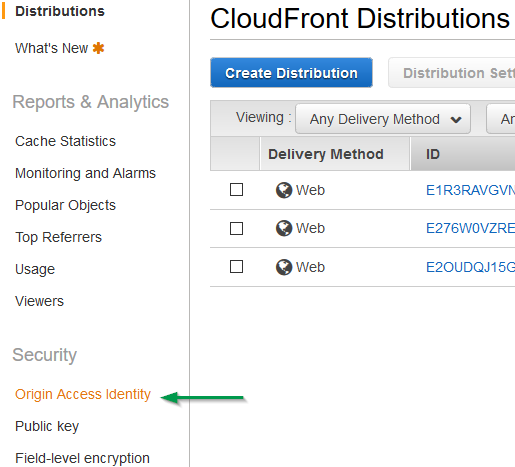
Creating an Origin Access Identity (via AWS Console)
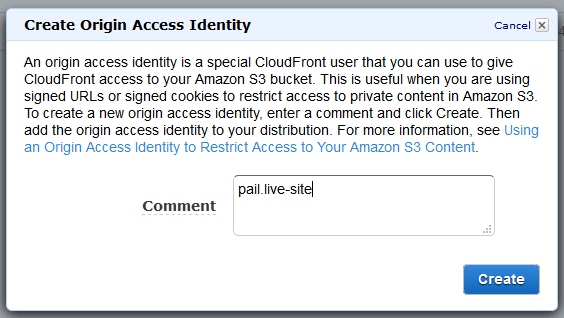
In the AWS Console, go to Cloudfront, select Origin Access Identity. Hit the Create Origin Access Identity button (giving it a comment / description).
Creating an Origin Access Identity (via AWS CLI)
From the command line, the following command is all you need:
aws cloudfront create-cloud-front-origin-access-identity --cloud-front-origin-access-identity-config CallerReference=20190209-1,Comment=pail.live-siteThe CallerReference is just an identify with your request, if you send subsequent requests re-using this value then it will return the properties of the OAI rather than creating a new one each time.
The Comment is what ends up as the description of the OAI.
Here is a typical response:
{
"Location": "https://cloudfront.amazonaws.com/2018-06-18/origin-access-identity/cloudfront/E5RMUQSMGLIU3",
"ETag": "E2041725THV2SX",
"CloudFrontOriginAccessIdentity": {
"Id": "E5RMUQSMGLIU3",
"S3CanonicalUserId": "2aa996c68af364019e1221157dcaca80495287a82468341bf0ff4ce34aa0d62ed5e3d8dd519cc1e8bf32641fceb4cd12",
"CloudFrontOriginAccessIdentityConfig": {
"CallerReference": "20190209-1",
"Comment": "pail.live-site"
}
}
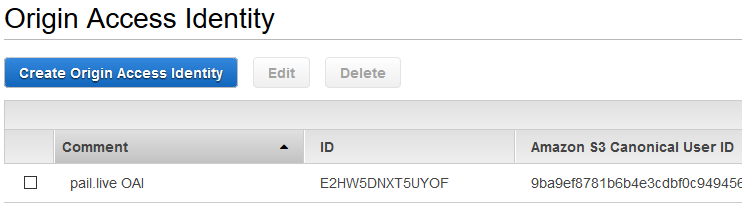
} Then in the AWS Console, you can see the new OAI:
Creating an Origin Access Identity (via AWS Cloudformation)
One can also create an OAI via Cloudformation, which I’ve done below. Initially the Cloudformation docs for creating an Origin Access Identity appear a little sparse, there’s simply just not much configuration required!
Here’s what our entire Cloudformation resources ends up as:
  OriginAccessIdentity:
    Type: AWS::CloudFront::CloudFrontOriginAccessIdentity
    Properties:
      CloudFrontOriginAccessIdentityConfig:
        Comment: "pail.live OAI"
The Cloudformation Template
So to use in our bucket and distribution configuration we lookup the Identifier and S3CanonicalId values from the Origin Access Identity resource. Alternatively, we’d pass them into our template as Parameters to give greatest flexibility for any changes in the future.
In the template we specify the creation of these resources:
- an S3 bucket
- an associated bucket policy
- a Cloudfront Distribution
- Route53 DNS entries
Previously, I manually created the pail.live HostedZone in Route53, which allowed me to specify the associated nameservers over at name.com.
Here’s the whole template:
AWSTemplateFormatVersion: '2010-09-09'
Description: "pail.live - OAI, bucket, bucket policy, cloudfront distro & associated DNS entry"

Parameters:
  AcmCertificateArn:
    Description: ARN for ACM Certificate
    Type: String
    Default: arn:aws:acm:us-east-1:152512262068:certificate/15a89014-cc9a-4866-a8dc-e3a7e897d36d

Resources:
  OriginAccessIdentity:
    Type: AWS::CloudFront::CloudFrontOriginAccessIdentity
    Properties:
      CloudFrontOriginAccessIdentityConfig:
        Comment: "pail.live OAI"

  WebsiteBucket:
    Type: "AWS::S3::Bucket"
    DeletionPolicy: "Retain"
    Properties:
      AccessControl: "BucketOwnerFullControl"
      BucketName: "pail-dot-live-website"

  WebsiteBucketBucketPolicy:
    Type: "AWS::S3::BucketPolicy"
    DependsOn: WebsiteBucket
    Properties:
      Bucket: !Ref WebsiteBucket
      PolicyDocument:
        Statement:
        - Action: "s3:Get*"
          Effect: Allow
          Resource: "arn:aws:s3:::pail-dot-live-website/*"
          Principal:
            CanonicalUser: !GetAtt OriginAccessIdentity.S3CanonicalUserId

  CloudfrontDistro:
    Type: "AWS::CloudFront::Distribution"
    Properties:
      DistributionConfig:
        Aliases:
        - pail.live
        - www.pail.live
        DefaultCacheBehavior:
          AllowedMethods:
          - "GET"
          - "HEAD"
          - "OPTIONS"
          DefaultTTL: 3600
          ForwardedValues:
            QueryString: "true"
            Cookies:
              Forward: "none"
          TargetOriginId: "S3Origin"
          ViewerProtocolPolicy: "redirect-to-https"
        DefaultRootObject: "index.html"
        Enabled: "true"
        HttpVersion: http2
        Origins:
        - Id: "S3Origin"
          DomainName: pail-dot-live-website.s3.amazonaws.com
          S3OriginConfig:
            OriginAccessIdentity: !Join ["", ["origin-access-identity/cloudfront/", !Ref OriginAccessIdentity]]
        ViewerCertificate:
          AcmCertificateArn: !Ref AcmCertificateArn
          MinimumProtocolVersion: "TLSv1.2_2018"
          SslSupportMethod: "sni-only"

  DomainDns:
    Type: "AWS::Route53::RecordSet"
    DependsOn: CloudfrontDistro
    Properties:
      AliasTarget:
        DNSName: !GetAtt CloudfrontDistro.DomainName
        HostedZoneId: "Z2FDTNDATAQYW2"
      HostedZoneName: pail.live.
      Name: pail.live
      Type: "A"

  DomainDnsWww:
    Type: "AWS::Route53::RecordSet"
    DependsOn: CloudfrontDistro
    Properties:
      AliasTarget:
        DNSName: !GetAtt CloudfrontDistro.DomainName
        HostedZoneId: "Z2FDTNDATAQYW2"
      HostedZoneName: pail.live.
      Name: www.pail.live
      Type: "A"
Summary
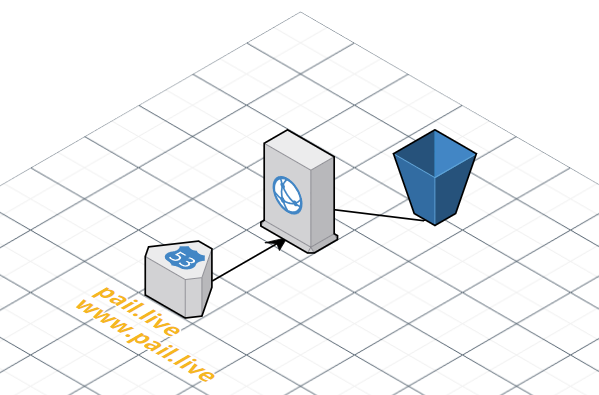
So here’s what the above template has produced:
Here’s the really simple CloudCraft layout:
Reference:
- https://docs.aws.amazon.com/AmazonCloudFront/latest/DeveloperGuide/private-content-restricting-access-to-s3.html
- https://docs.aws.amazon.com/AWSCloudFormation/latest/UserGuide/aws-resource-cloudfront-cloudfrontoriginaccessidentity.html
- https://docs.aws.amazon.com/AWSCloudFormation/latest/UserGuide/aws-properties-s3-bucket.html
- https://docs.aws.amazon.com/AWSCloudFormation/latest/UserGuide/aws-properties-s3-policy.html
- https://docs.aws.amazon.com/AWSCloudFormation/latest/UserGuide/aws-resource-cloudfront-distribution.html
- https://docs.aws.amazon.com/AWSCloudFormation/latest/UserGuide/aws-properties-route53-recordset.html